Connecting 3rd-party APIs
Creators can securely connect their generated apps to third party services (such as OpenAI, X/Twitter, n8n, Zapier, Google, Coinmarketcap, Coinbase Wallet, etc) by providing Dreamspace with an API key.
Quick Start Instructions
Note: Detailed instructions are further down on the page.
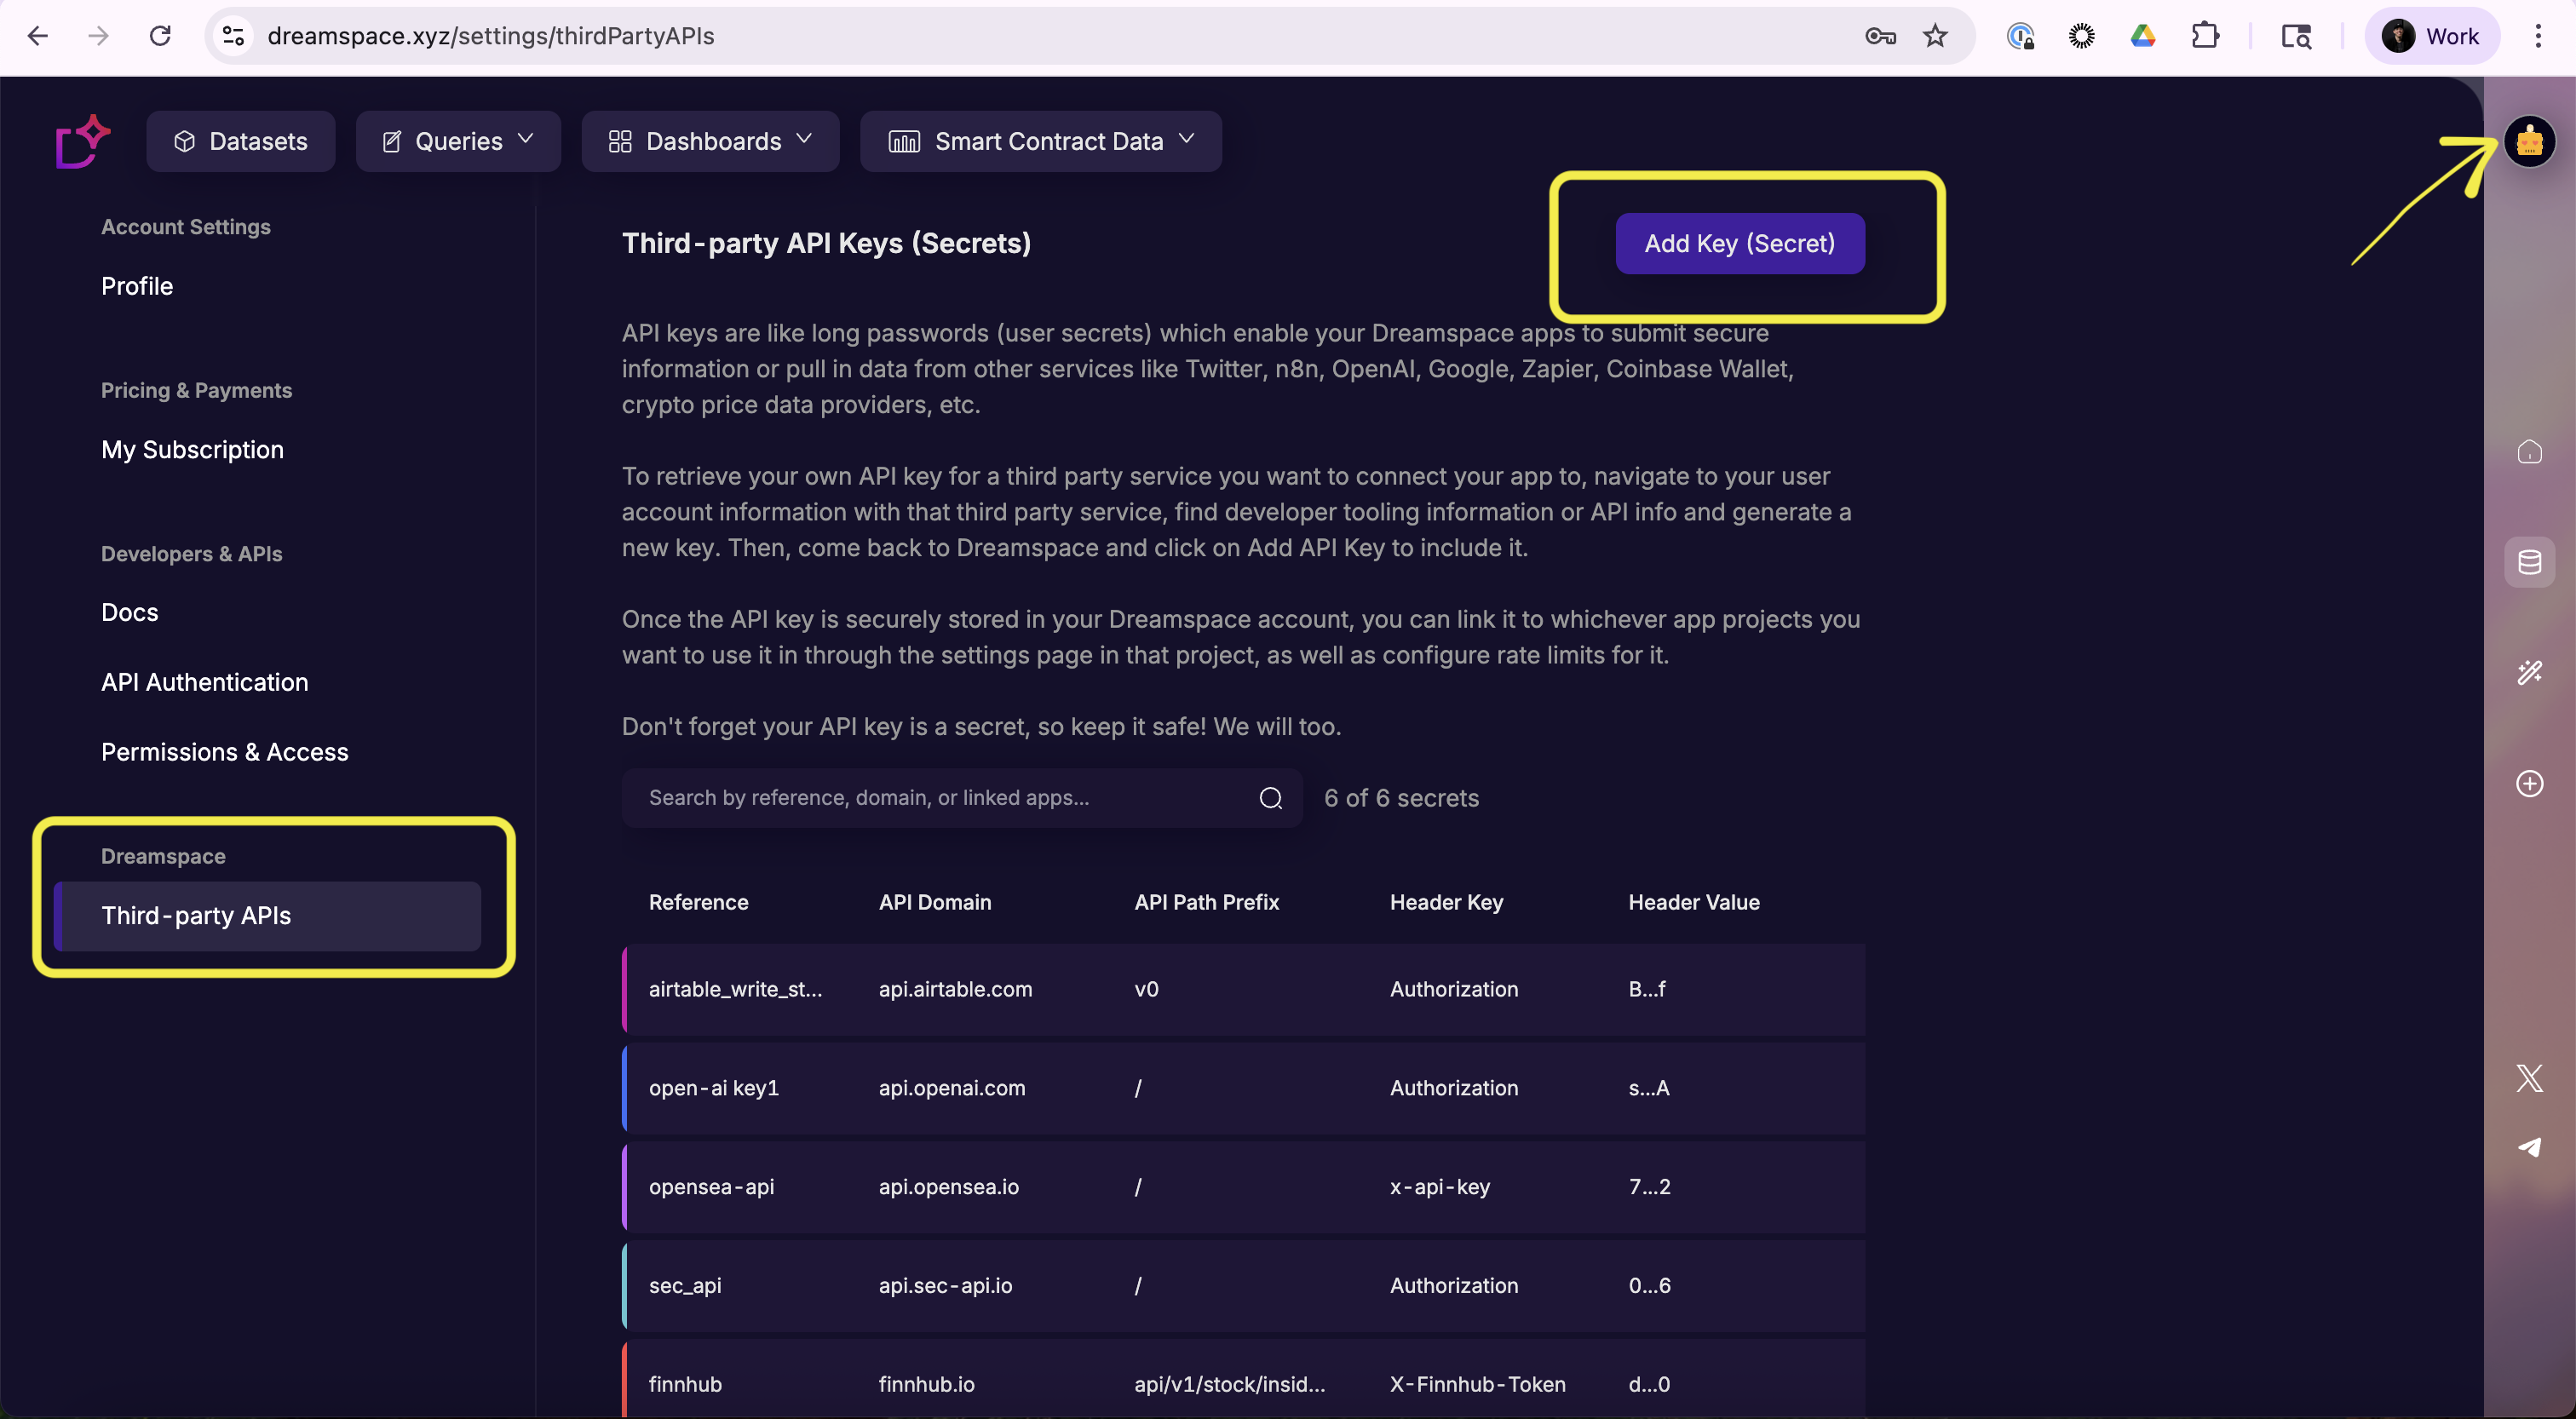
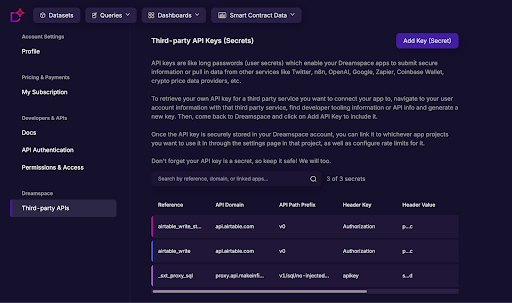
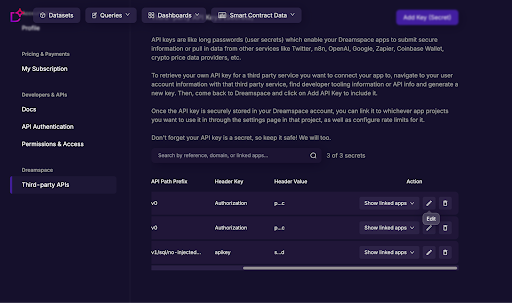
Step 1: Open the Dreamspace API key settings! First, navigate to the "My Account" panel by clicking your robot-style avatar icon in the top right of Dreamspace AI Studio. This opens up the "My Account" settings. Navigate to the "Third-party APIs" page at the very bottom of the left side navigation links in the "My Account" panel. Click the "Add Key (Secret)" button in the picture below.
Step 2: Add a new key! Get your API key from the developer platform or API service of your choice (i.e. OpenAI, X (Twitter), n8n, Zapier, Google Suite, Coinmarketcap, Coinbase Wallet, Binance, Reddit, Discord, Slack, YouTube, TikTok, Airtable, Notion, Trello, Linear, Kraken, Etherscan, Alchemy, Moralis, DefiLlama, Dropbox, Calendly, DocuSign, GitHub, Jira, Anthropic Claude, Microsoft Cognitive Services, Stripe, PayPal, Shopify, Square, etc).
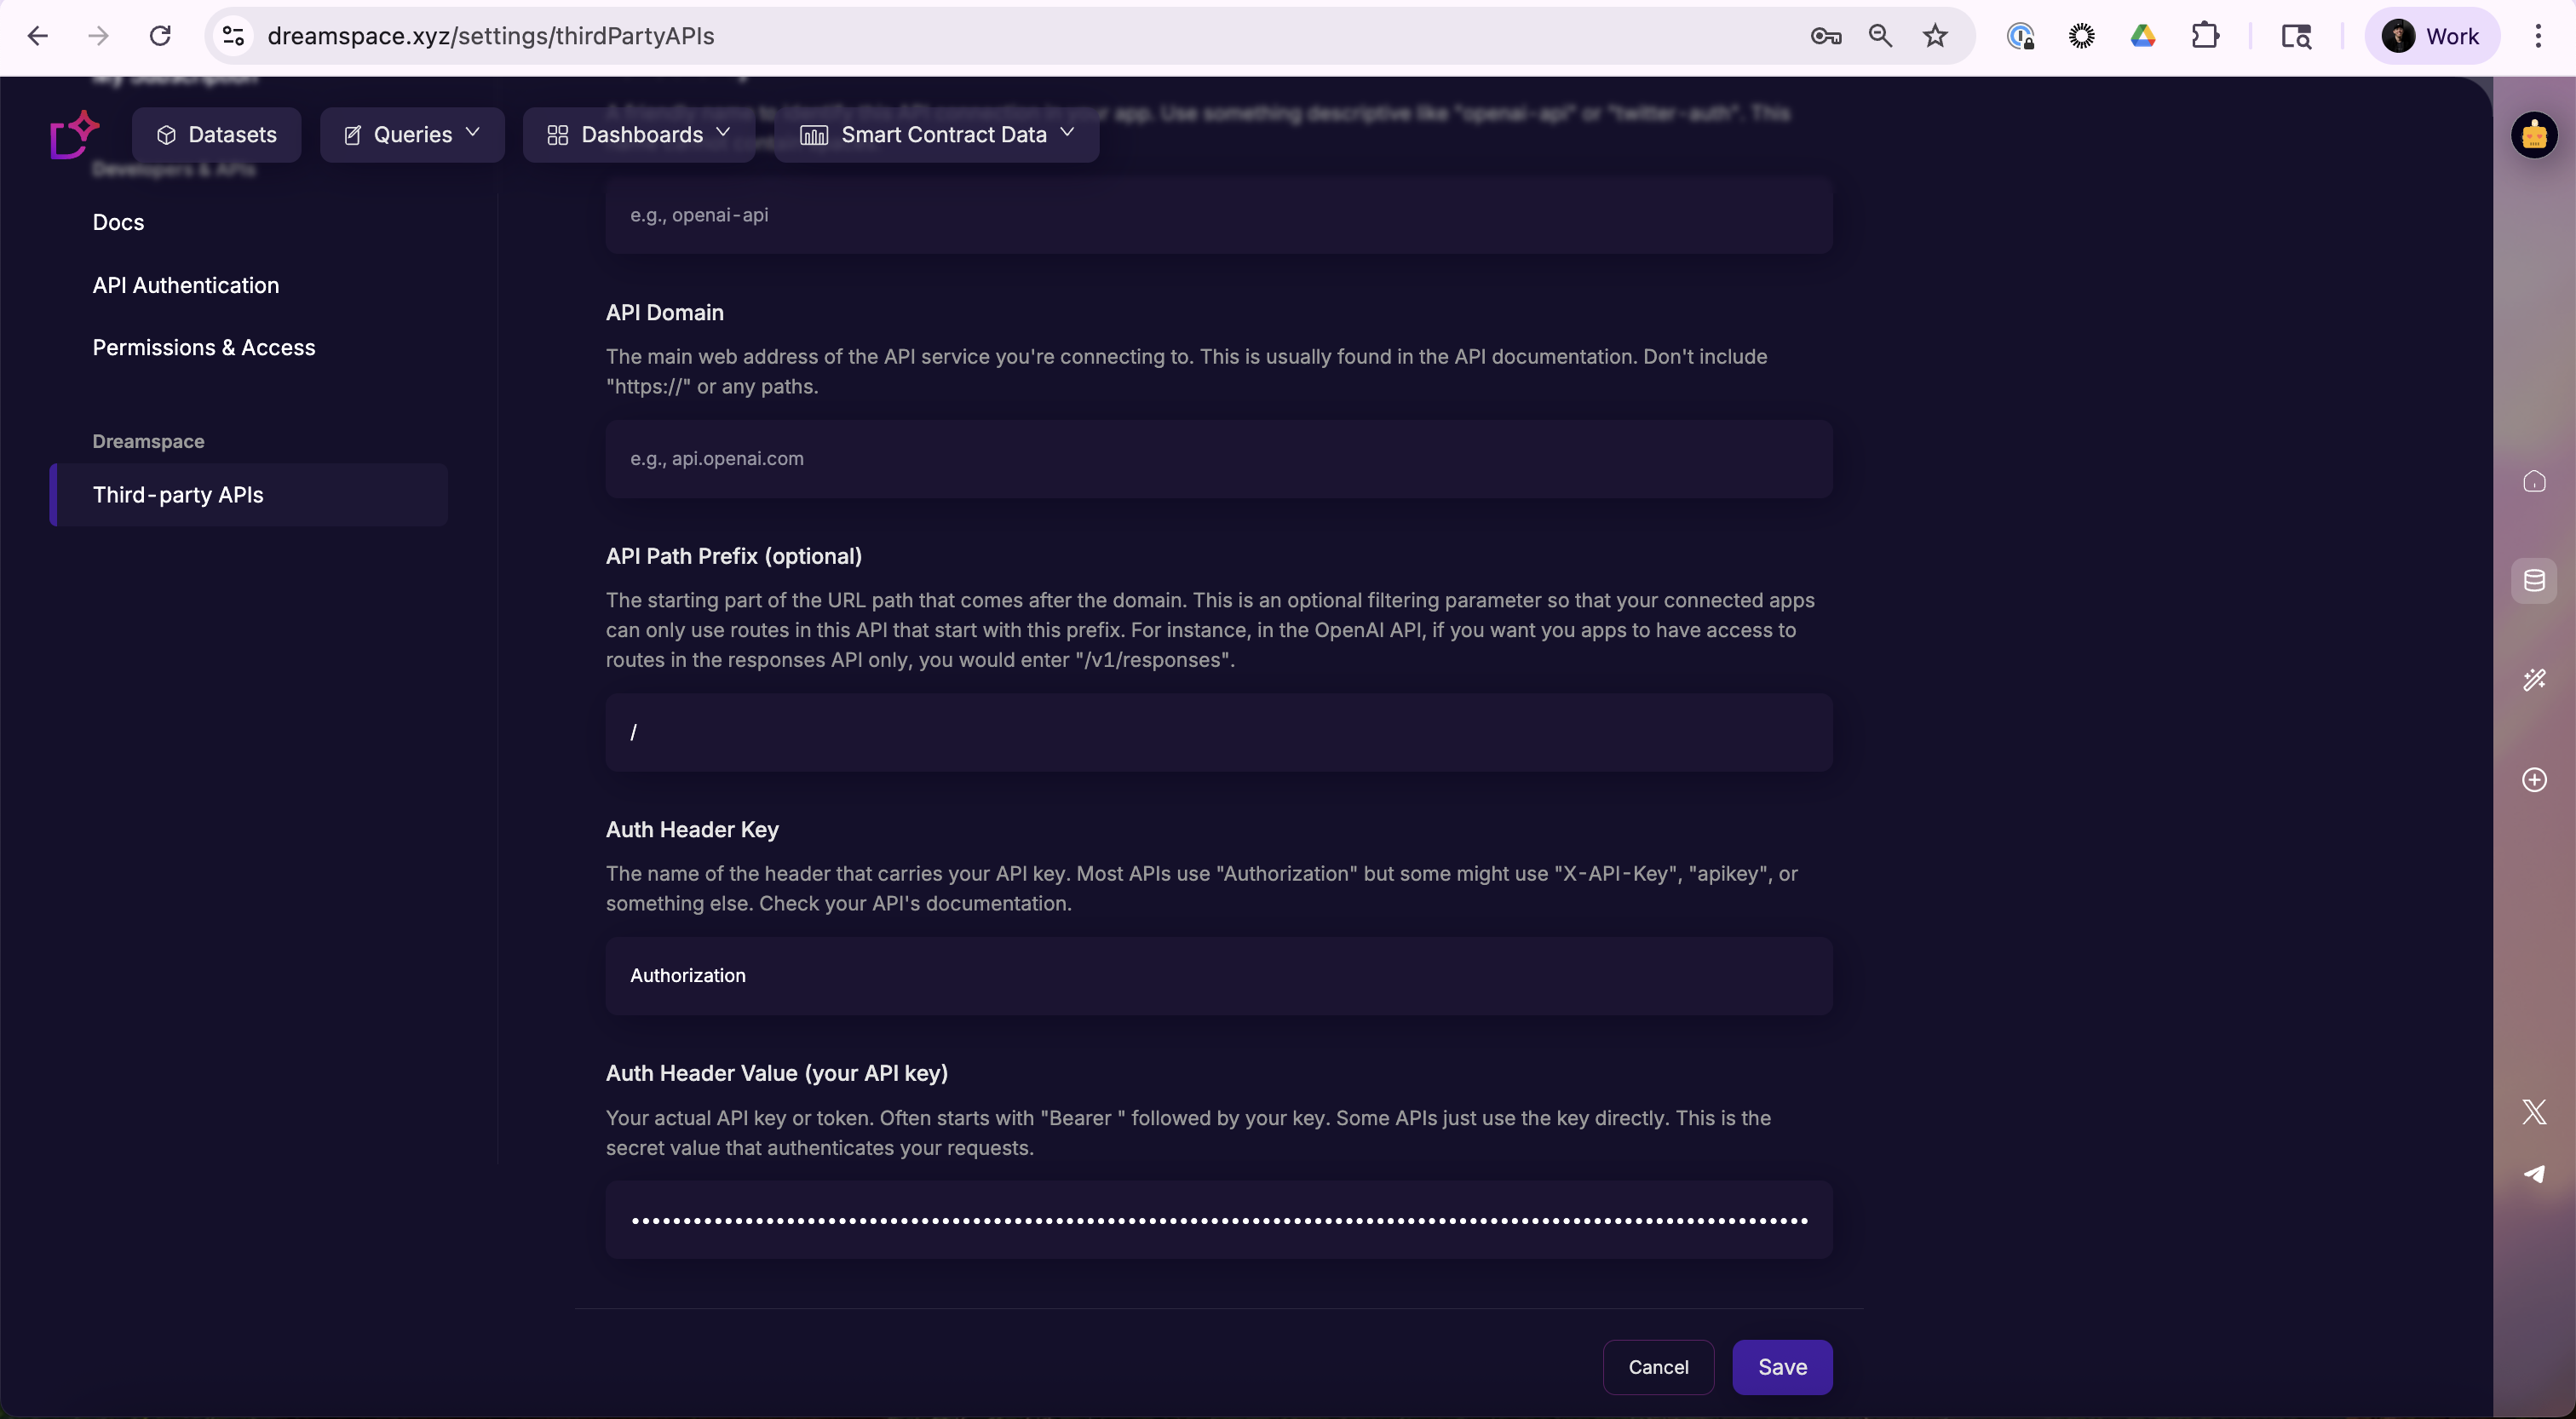
Input all the details of your API key before saving, such as the domain (ask ChatGPT if you're not sure) the path prefix (usually leave this as the default already pre-filled in the input), a header key such as "Authorization" (very common for popular services like OpenAI), and then the actual key itself. Keep your key secure, and we will too!
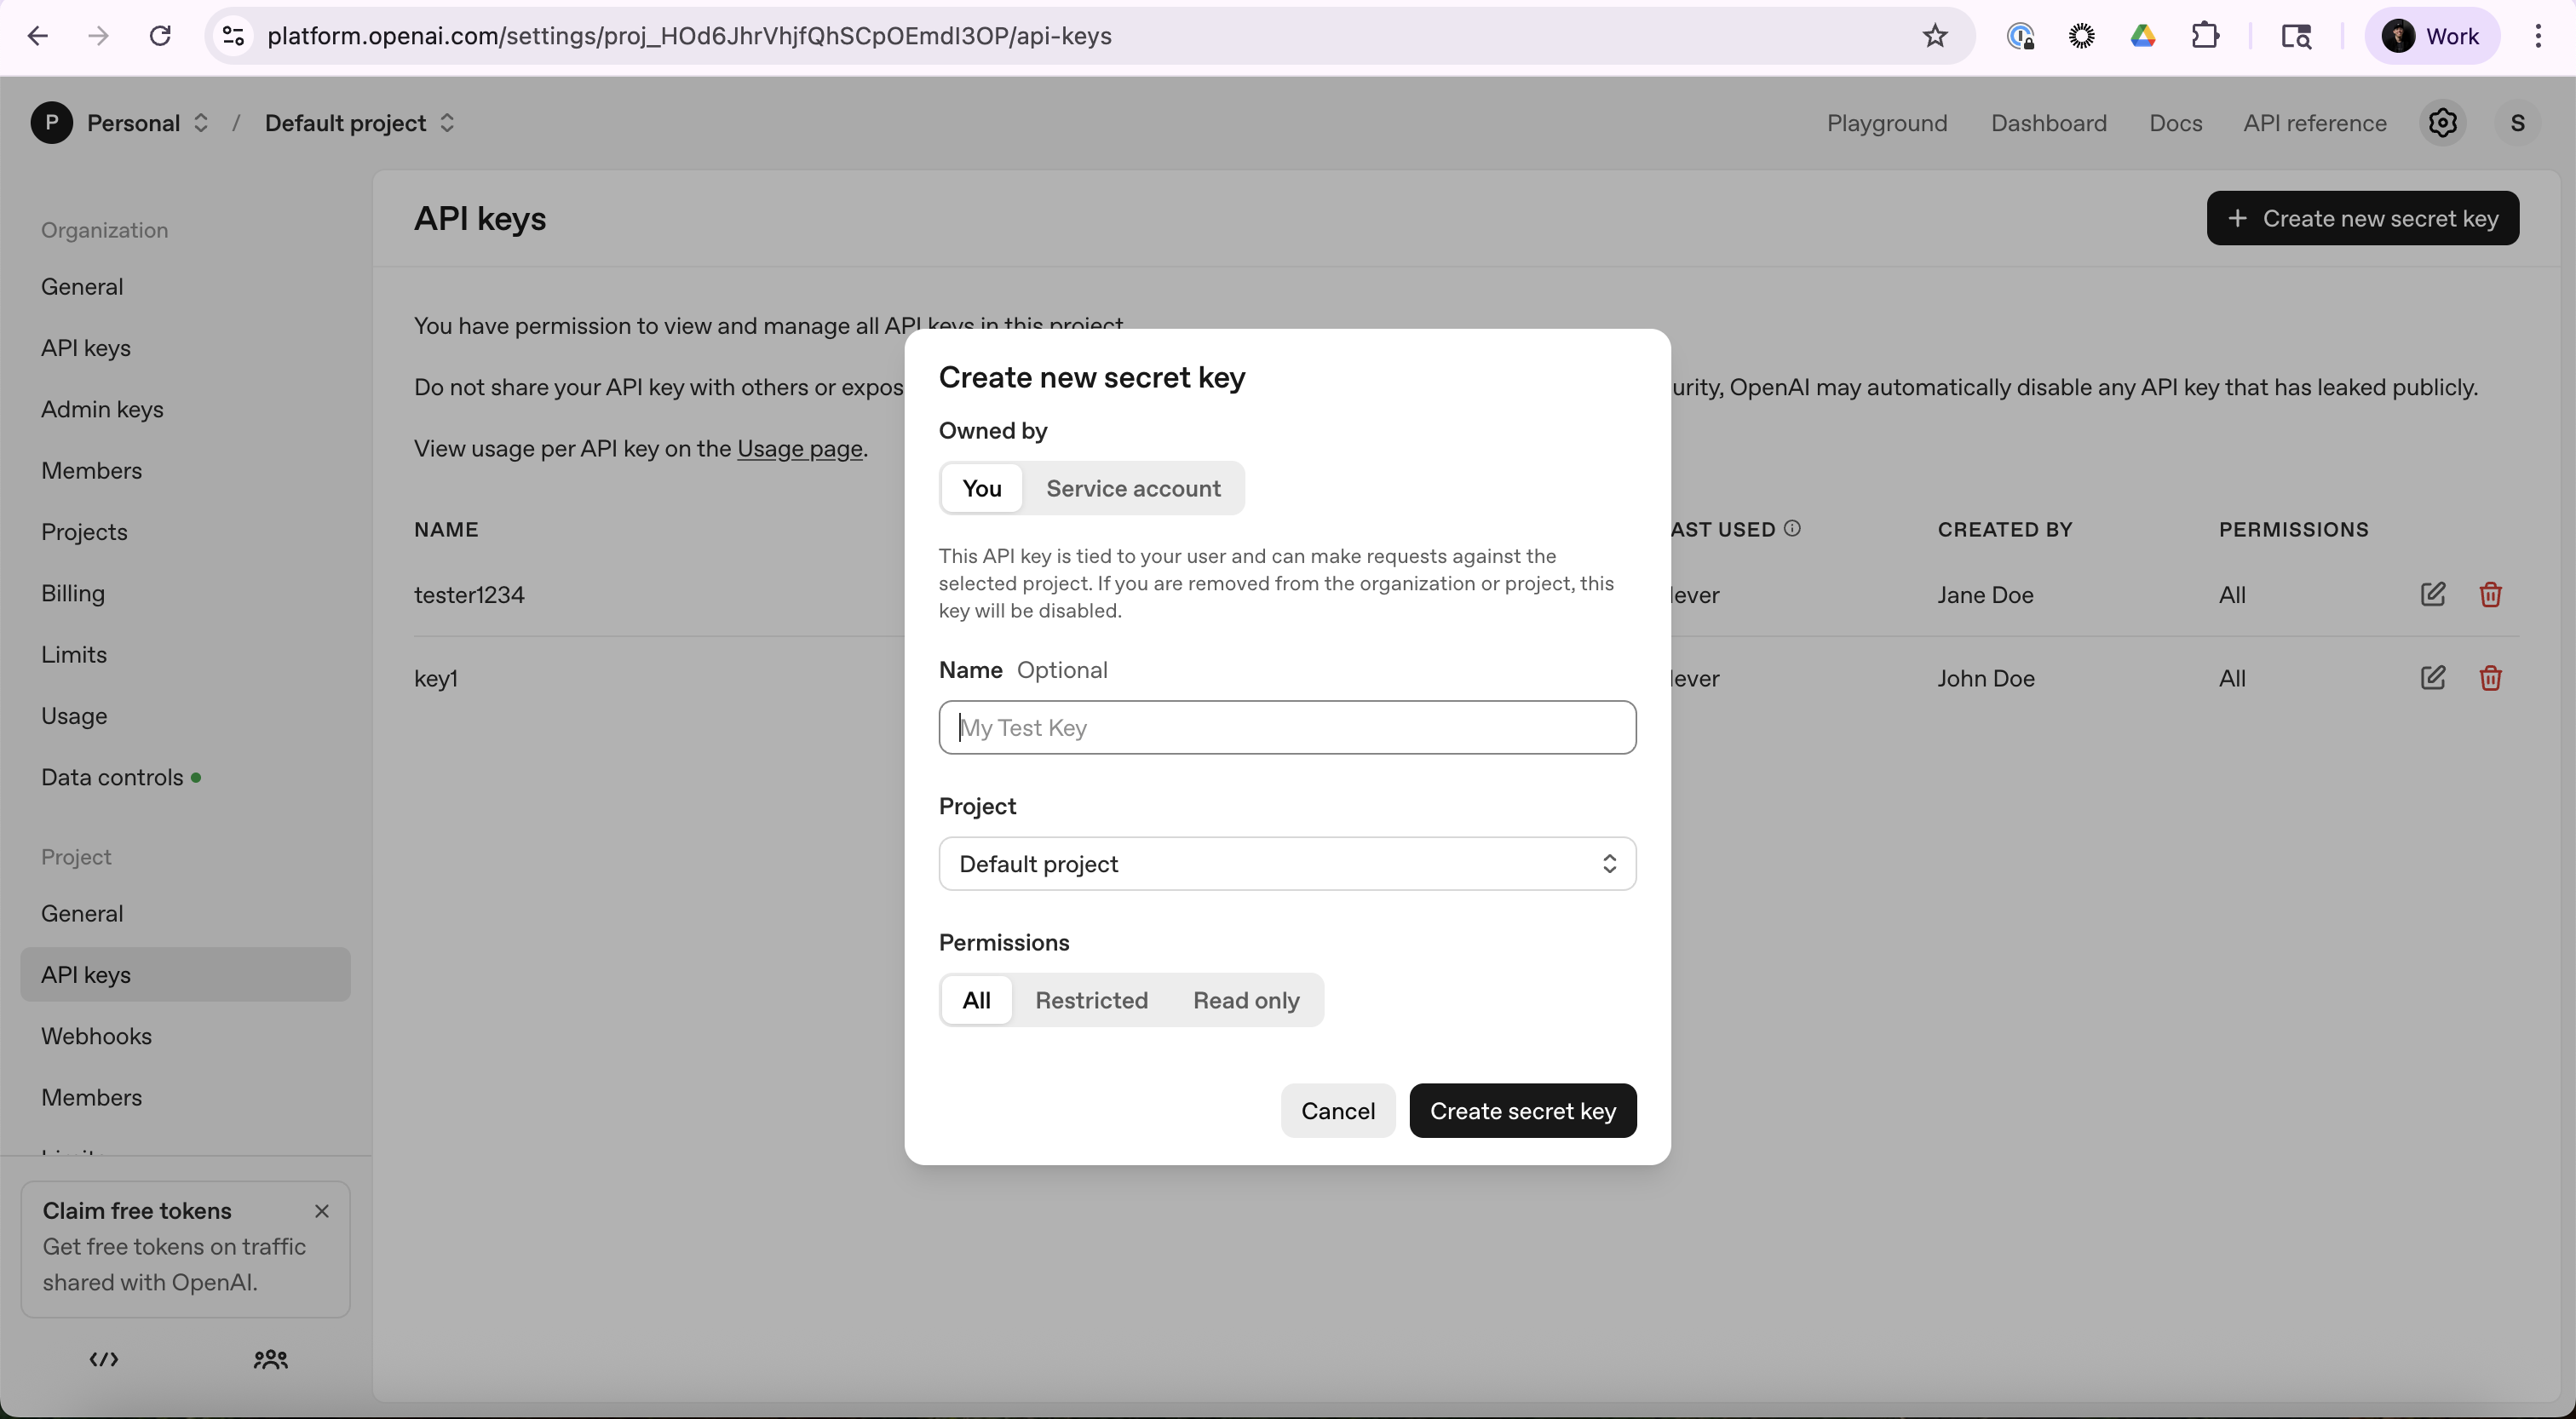
Note: you can ask ChatGPT or Google how to get an API key for your favorite service. It often requires signing up for a developer account and navigating to the developer settings for your favorite service. For example, to get an OpenAI API key, select "API Platform" in the log-in dropdown in the top right at https://openai.com/api/, and finally log in to the developer tooling platform to select the "API Keys" tab on the left side nav panel.
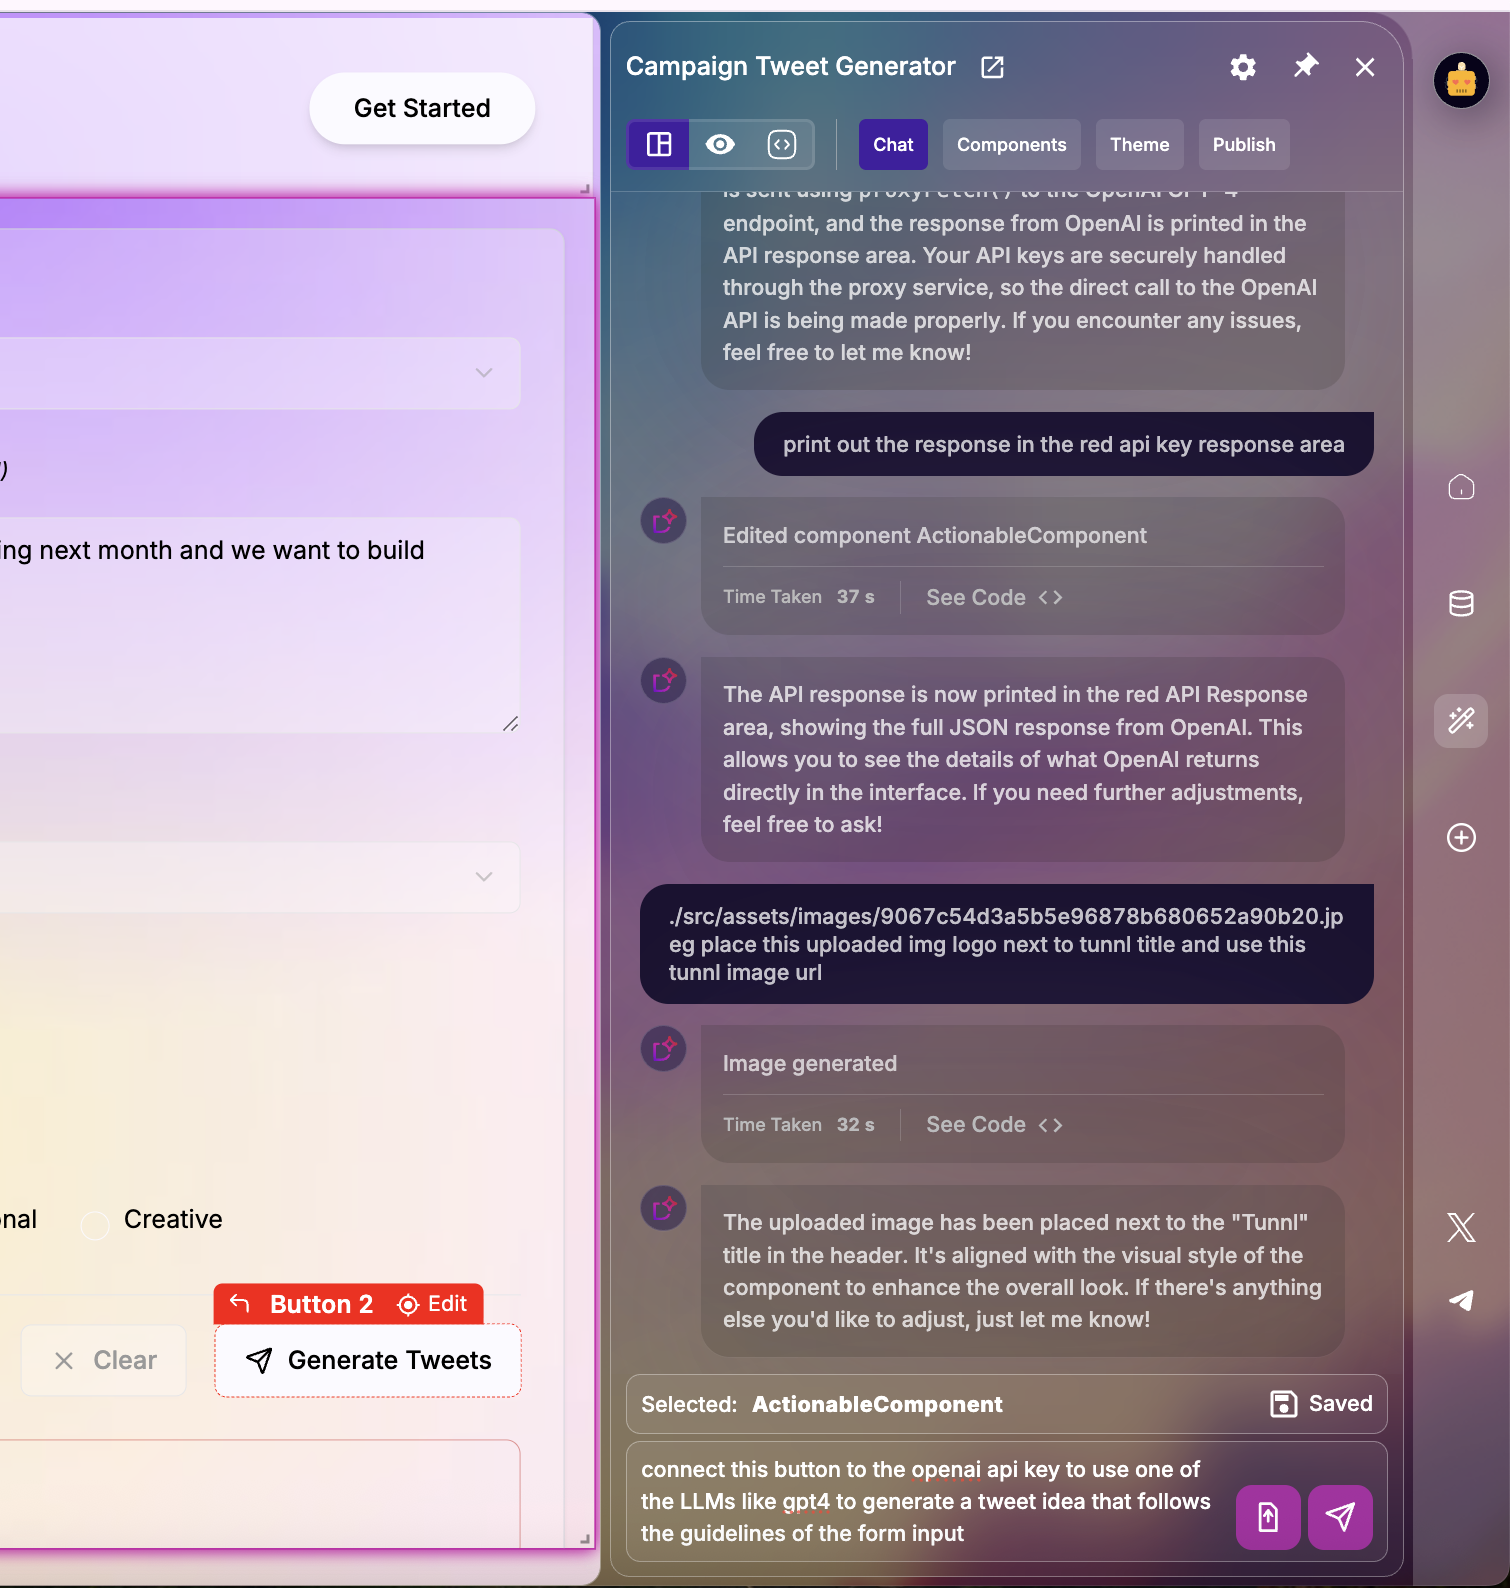
Step 3: Use the API in your generated app! Ask the chatbot in the Dreamspace AI Studio (canvas editor, while editing your generated app) to assist with you with using your provided third-party API key in your generated app. For example, tell the chatbot to reach out to the 3rd-party API service and use the response to populate a selected container/component of your generated app. This is an easy way to test the connection to your favorite API.
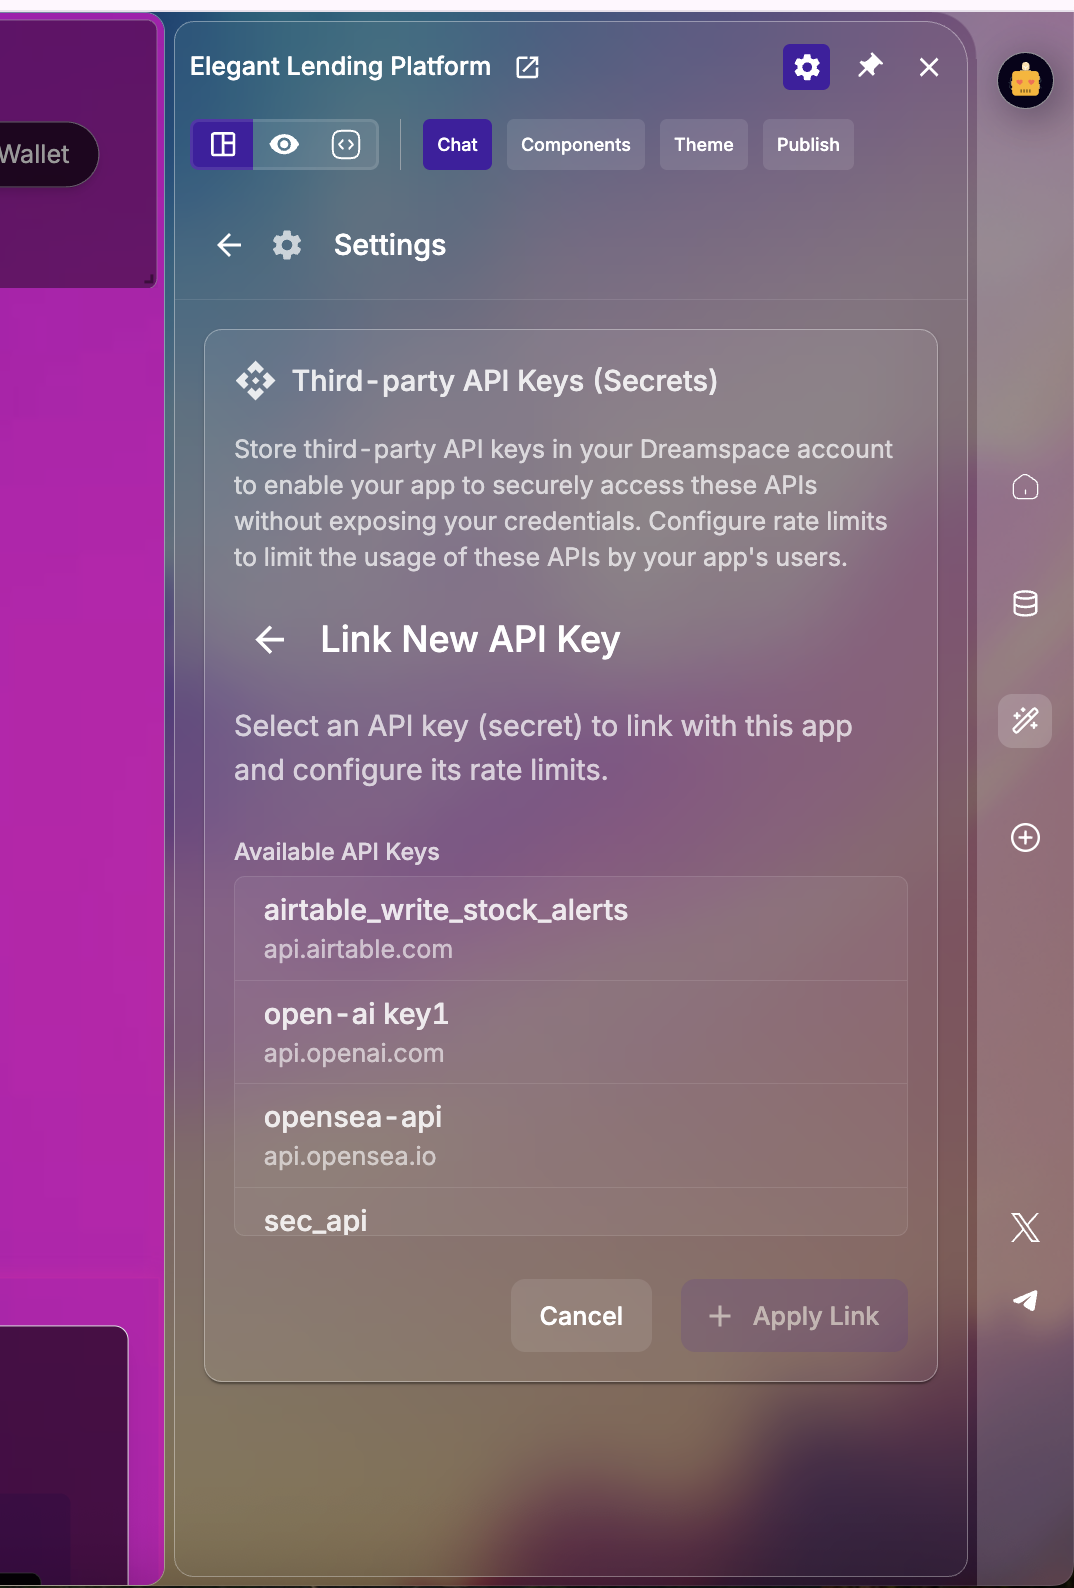
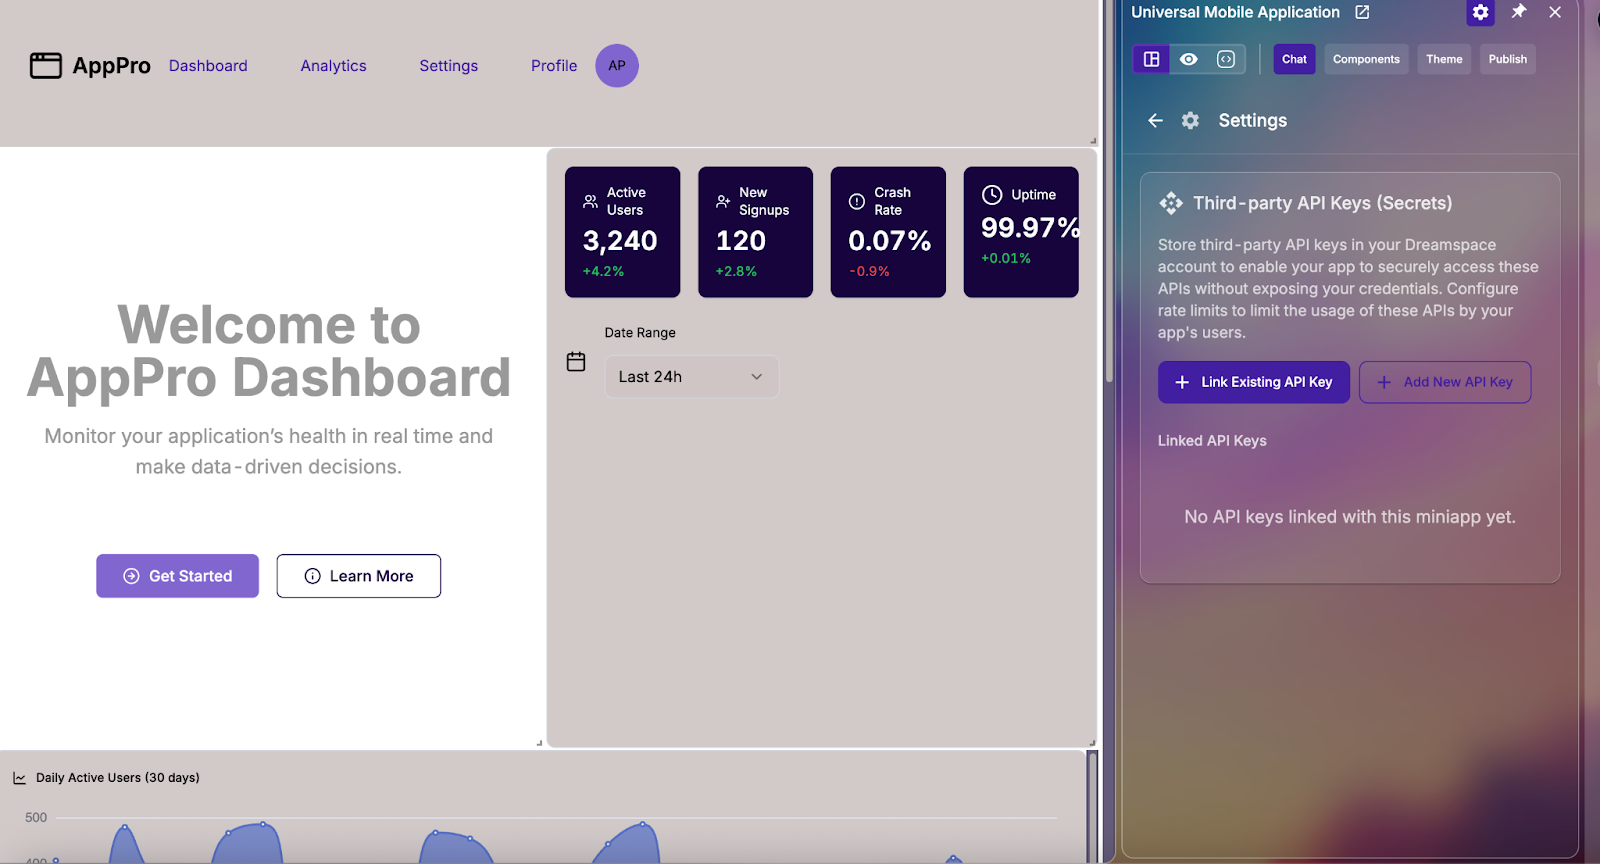
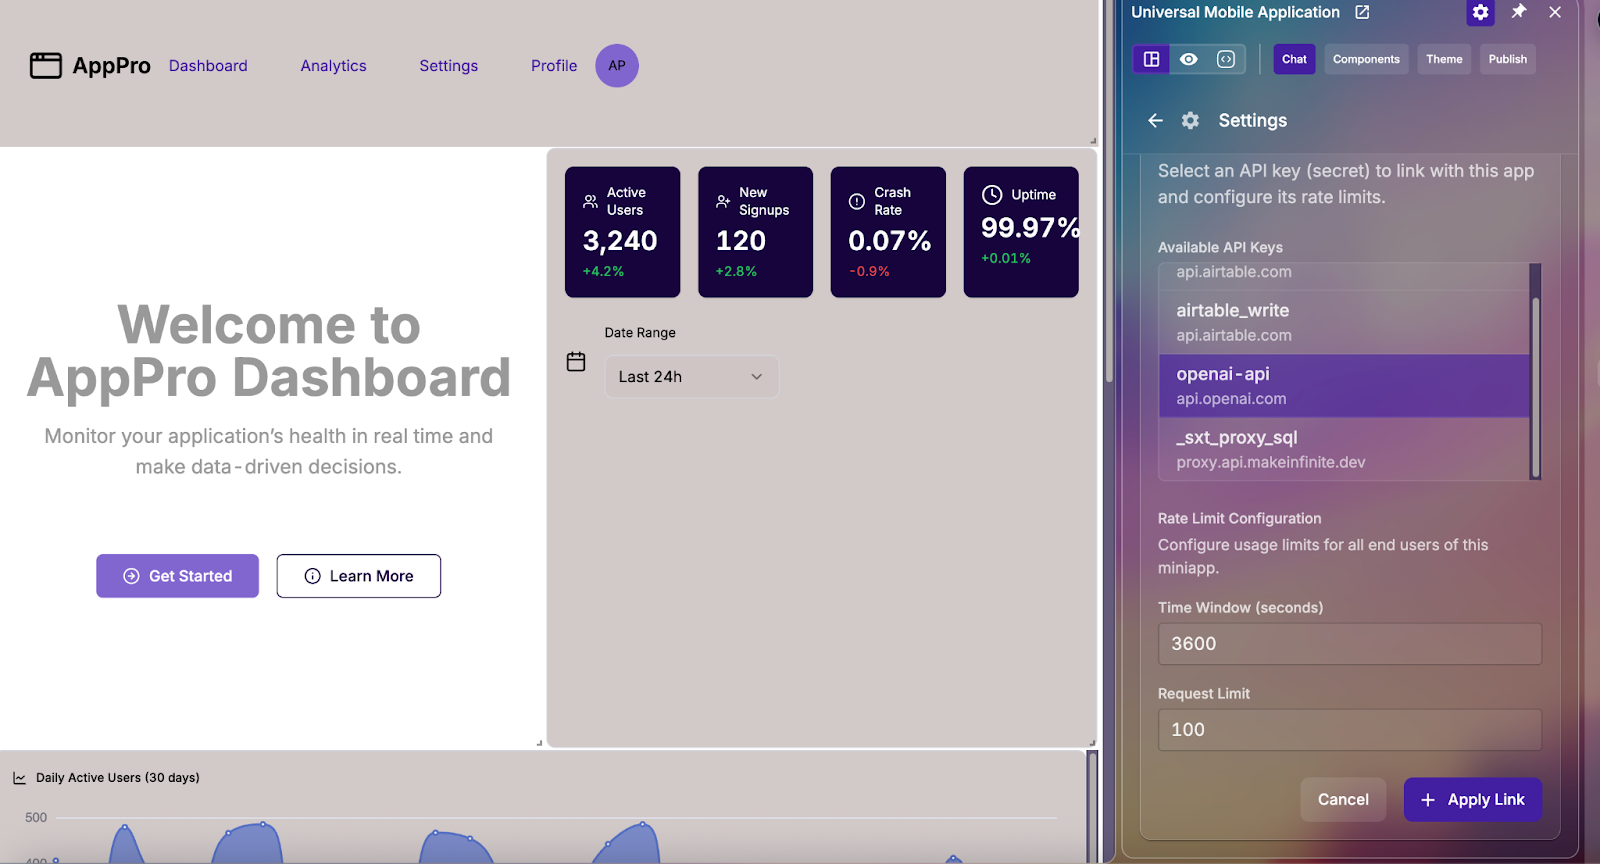
Step 4: Link new API keys with older apps! Any time you add a new API key, all new projects created from that point forward will have the recently added API key automatically linked... meaning, all new projects are automatically linked with API keys added prior to the project's initial creation. So, you'll need to manually link newer API keys if you want to use them in older projects. To do so, navigate to the "settings" page in the chatbot ('gear' icon in the top right of the chatbot next to the 'pin' icon), which will let you "Link Existing API Key". Choose the new key to link to this project, and apply the link.
IMPORTANT NOTE: If you start working on a project, then add a new API key in the "My Account" section afterwards, you will need to link the new API key to your current project. Navigate to 'Settings' page in the chatbot and link the API key which you recently added in the "My Account" page for Dreamspace Third-party API Keys. This will link the new API key to your current project to make it available to be used in your generated app.
Detailed Instructions for API Connectivity
Step 0 · Introduction
Dreamspace allows your miniapp to talk to external APIs through secure keys (called secrets) and actions. The flow looks like this:
- You configure the API key securely in Dreamspace.
- Your miniapp calls the API through an action (e.g., from a chatbot or a form).
- The response is used in your UI (shown to the user or saved in a database).
Here are the three example APIs and how they will be used:
- OpenAI → We call the OpenAI API (api.openai.com) to power the chatbot. The request includes the user’s message, and the response is a model-generated reply.
Typical call: POST /v1/responses with header Authorization: Bearer <OPENAI_KEY> and JSON body { model: "gpt-4.1-mini", input: [...] }.- Finnhub → We call the Finnhub API (finnhub.io) to fetch insider stock transactions and display them. The request authenticates with X-Finnhub-Token and the response is a JSON object containing an array of transactions.
Typical call: GET /api/v1/stock/insider-transactions with header X-Finnhub-Token: <FINNHUB_KEY>.- Airtable → We call the Airtable API (api.airtable.com) to store user information in the Users table. The request uses Authorization: Bearer AIRTABLE_KEY and includes a JSON payload with the fields to insert.
Typical call: POST /v0/<BASE_ID>/Users with header Authorization: Bearer <AIRTABLE_KEY> and body { records: [{ fields: {...}}] }.Keep this flow in mind: configure → call → display or store. The next steps explain exactly how to configure and connect them in Dreamspace.
Step 1 · Configure an API Key (Secret)
- Go to Account Settings → Third-party APIs
- Click Add New API Key (Secret) and fill in:
- Name this key: identifier without spaces (e.g., openai-api, finnhub-api, airtable-api).
- API Domain: the provider domain (api.openai.com, finnhub.io, api.airtable.com).
- API Path Prefix (optional): we recommend just using / so you don’t limit access to specific endpoints.
- Auth Header Key and Auth Header Value: depends on the provider (see below).

- Save. Your miniapp can now reference this secret securely.
👉 Example Configurations:
- OpenAI (ChatGPT 4.1 Mini)
- Name: openai-api
- API Domain: api.openai.com
- API Path Prefix: /
- Auth Header Key: Authorization
- Auth Header Value: Bearer sk-xxxxxxxx
- Finnhub (Stock Insider Transactions)
- Name: finnhub-api
- API Domain: finnhub.io
- API Path Prefix: /
- Auth Header Key: X-Finnhub-Token
Auth Header Value: <your_finnhub_token>
- Airtable (User Stocks Table)
- Name: airtable-api
- API Domain: api.airtable.com
- API Path Prefix: /
- Auth Header Key: Authorization
Auth Header Value: Bearer <your_airtable_key>
Step 1.1 · Activate the API in Your Miniapp
Once you’ve created your API key secret, you need to make sure it is active inside your miniapp.
- Go to your miniapp settings and open the API Keys / Secrets section.
- Link the API key you created so that your miniapp can use it.
- Verify that it shows up as “Linked API Keys” in the panel.
Then, select and configure the limits of usage for the API:
- Define how many calls can be made per user/session/day depending on your needs.
- Apply sensible defaults to avoid hitting provider rate limits.
Step 2 · Call the API from the Chatbot
When integrating with the chatbot, you define actions that call your APIs. Each case has its own context:
2.1. OpenAI (Chatbot Model)
Context: We want the chatbot to respond using the gpt-4.1-mini model. We want to explicitly define it as otherwise the LLM could generate an API call using a deprecated model
Prompt to generate it: use the open-api key to use chatgpt 4.1 mini and generate a chatbot that replies to the user

2.2. Finnhub (Stock Insider Transactions)
Context: We want to fetch insider transactions from Finnhub and display them in the frontend. As a result, we want to provide the Chatbot with the information context of what will be displayed
Prompt to generate it:
do a third party api call curl -H "X-Finnhub-Token: XXXX" \
  "https://finnhub.io/api/v1/stock/insider-transactions”:
which returns this data:
 {"data":[{"change":71400,"currency":"CAD","filingDate":"2025-08-14","id":"","name":"Malcolm, Kelly James","share":108400,"source":"sedi","symbol":"BIG.V","transactionCode":"16","transactionPrice":0.7}, {"change":150000,"currency":"CAD","filingDate":"2025-08-14","id":"","name":"Goodridge, Christopher Michael","share":225000,"source":"sedi","symbol":"FORA.TO","transactionCode":"50","transactionPrice":6},{"change":250000,"currency":"CAD","filingDate":"2025-08-14","id":"","name":"Goodridge, Christopher Michael","share":250000,"source":"sedi","symbol":"FORA.TO","transactionCode":"56","transactionPrice":0}
2.3. Airtable (Stock Alerts Users)
Context: We want to capture user info (Telegram handle, Email, List of Stocks) and write it to Airtable. W
Prompt to generate it:
generate a form, using the third party api of airtable_write_stock_alerts that syncs with the following airtable table with settings:
const BASE_ID = 'appbTEdRJ61UEKFLV’;  const TABLE_NAME = 'Users’;  Columns = Telegram_handle, Email, List_Stocks
Following this structure   : const url = `https://api.airtable.com/v0/appbTEdRJ61UEKFLV/Users`;
Step 3 · Modify or Delete an API
- Go to My Account → Third-party APIs.
- Scroll right to access Edit or Delete.
- After editing or deleting, test your miniapp again to ensure all actions still work.
Updated 11 months ago